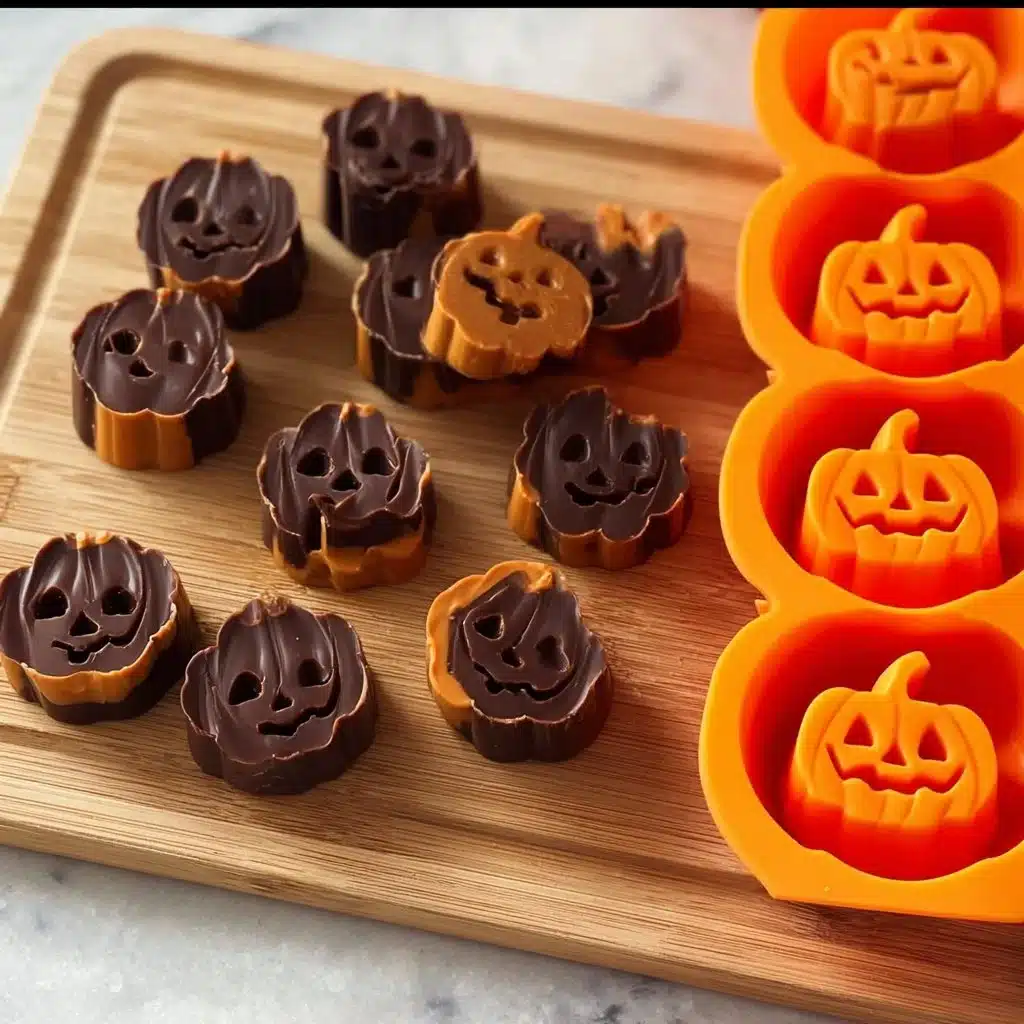
Halloween Peanut Butter Cups
Get ready for Halloween with these fun and easy Halloween Peanut Butter Cups! Perfect for parties, trick-or-treaters, or a spooky night in, these delightful treats are a spooky twist on a classic favorite. With a creamy peanut butter filling surrounded by chocolate, they’re sure to be a hit. Let’s dive into why you should make these delicious goodies!
Why You’ll Love This Recipe
- Quick & Easy: You can whip these up in no time!
- Simple Ingredients: Just a few straightforward items are needed.
- Perfect for Halloween: The festive colors and shapes make them ideal for the occasion.
- Crowd-Pleaser: Kids and adults alike will enjoy these treats.
- Unbelievably Delicious: The chocolate and peanut butter combine for a fantastic flavor.
These Halloween Peanut Butter Cups stand out because they are simple to customize and have a delightful taste that appeals to everyone. Treat your loved ones and enjoy the cozy satisfaction of making these adorable sweets!
Ingredients Needed
- For the Chocolate Shell:
- 1 cup milk chocolate chips
- 1 cup dark chocolate chips
- For the Peanut Butter Filling:
- 1 cup creamy peanut butter
- 1/2 cup powdered sugar
- 1/2 teaspoon vanilla extract
- For Decoration:
- Halloween-themed sprinkles or edible decorations
How to Make Halloween Peanut Butter Cups
- Prepare the Cups: Line a muffin tin with cupcake liners for easy removal.
- Melt the Chocolate: In a microwave-safe bowl, combine the milk and dark chocolate chips. Microwave in 30-second intervals, stirring in between, until completely melted. This is crucial to ensure smooth, melted chocolate.
- First Layer: Spoon about 1 tablespoon of the melted chocolate into each cupcake liner. Use the back of a spoon to spread it up the sides. This creates a nice shell.
- Chill the Layers: Place the muffin tin in the fridge for about 10 minutes until the chocolate hardens.
- Make the Peanut Butter Filling: In a medium bowl, mix the peanut butter, powdered sugar, and vanilla extract until well blended. This mixture should be thick but smooth.
- Add the Filling: Once the chocolate is set, add about 1 tablespoon of the peanut butter mixture into each cup.
- Top with Chocolate: Cover each peanut butter filling with the remaining melted chocolate. Use the spoon to spread it evenly.
- Chill Again: Return the muffin tin to the fridge for another 10 to 15 minutes until fully set.
- Decorate: After the cups have set, sprinkle some Halloween-themed decorations on top for a festive look.
- Enjoy: Once everything is set, peel off the liners and serve!
How to Serve Halloween Peanut Butter Cups
Present your Halloween Peanut Butter Cups on a spooky platter or in a themed basket. They look great alongside other Halloween treats like candy corn or gummy worms.
How to Store Halloween Peanut Butter Cups
Store any leftover cups in an airtight container at room temperature for up to one week. If you need to keep them longer, they can also be refrigerated for up to two weeks.
Tips to Make Halloween Peanut Butter Cups
- Use good quality chocolate for a richer flavor.
- Try using crunchy peanut butter for added texture.
- Freeze the cups for a refreshing treat!
Variation
- Pumpkin Spice: Mix in a little pumpkin spice into the peanut butter for a seasonal twist.
- Different Chocolate Types: Use white chocolate or dark chocolate alone for a different flavor experience.
FAQs
Can I use crunchy peanut butter instead of creamy?
Yes, you can! Crunchy peanut butter will add a fun texture to your cups.
Can I make these peanut butter cups vegan?
Absolutely! Use dairy-free chocolate and a plant-based peanut butter.
How long do these peanut butter cups last?
They can last up to a week at room temperature or up to two weeks in the fridge.
Conclusion
These Halloween Peanut Butter Cups are quick to make, delicious, and sure to impress both kids and adults. With just a few simple ingredients, you can create a fun treat perfect for the spooky season. If you try this recipe, please leave a comment and a star rating! Share your creations on Pinterest or Facebook. What are your favorite variations? Let us know in the comments below!

Halloween Peanut Butter Cups
- Total Time: 30 minutes
- Yield: 12 cups 1x
- Diet: Vegetarian
Description
These Halloween Peanut Butter Cups are the perfect spooky treat. Creamy peanut butter filling wrapped in rich chocolate, topped with festive decorations. Easy to make, fun to share, and perfect for Halloween parties or a cozy night in.
Ingredients
1 cup milk chocolate chips
1 cup dark chocolate chips
1 cup creamy peanut butter
1/2 cup powdered sugar
1/2 teaspoon vanilla extract
Halloween-themed sprinkles or edible decorations
Instructions
1. Line a muffin tin with cupcake liners.
2. In a microwave-safe bowl, melt the milk and dark chocolate chips in 30-second intervals, stirring each time.
3. Spoon 1 tablespoon of the melted chocolate into each liner and spread up the sides.
4. Place the tray in the fridge for 10 minutes to set.
5. In another bowl, mix peanut butter, powdered sugar, and vanilla extract until smooth.
6. Scoop 1 tablespoon of the peanut butter filling into each hardened chocolate cup.
7. Top each cup with the remaining melted chocolate and smooth it out.
8. Refrigerate again for 10–15 minutes or until fully set.
9. Add Halloween-themed sprinkles or candy decorations on top.
10. Peel off the liners and serve!
Notes
Use good-quality chocolate for the best flavor.
Crunchy peanut butter adds a fun texture.
For a festive twist, add a little pumpkin spice to the peanut butter filling.
- Prep Time: 15 minutes
- Cook Time: 5 minutes
- Category: Dessert
- Method: No-Bake
- Cuisine: American
Nutrition
- Serving Size: 1 cup
- Calories: 210
- Sugar: 17g
- Sodium: 90mg
- Fat: 13g
- Saturated Fat: 6g
- Unsaturated Fat: 6g
- Trans Fat: 0g
- Carbohydrates: 20g
- Fiber: 2g
- Protein: 4g
- Cholesterol: 2mg