
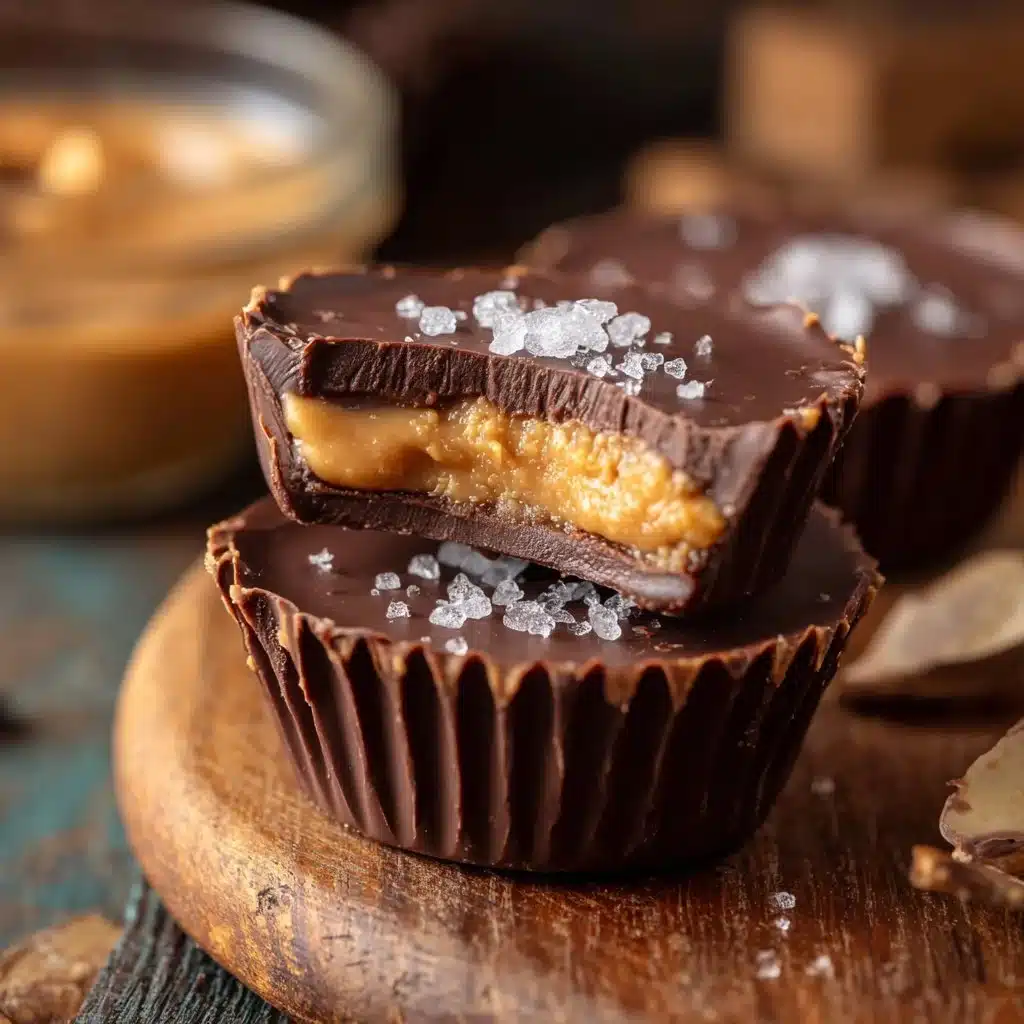
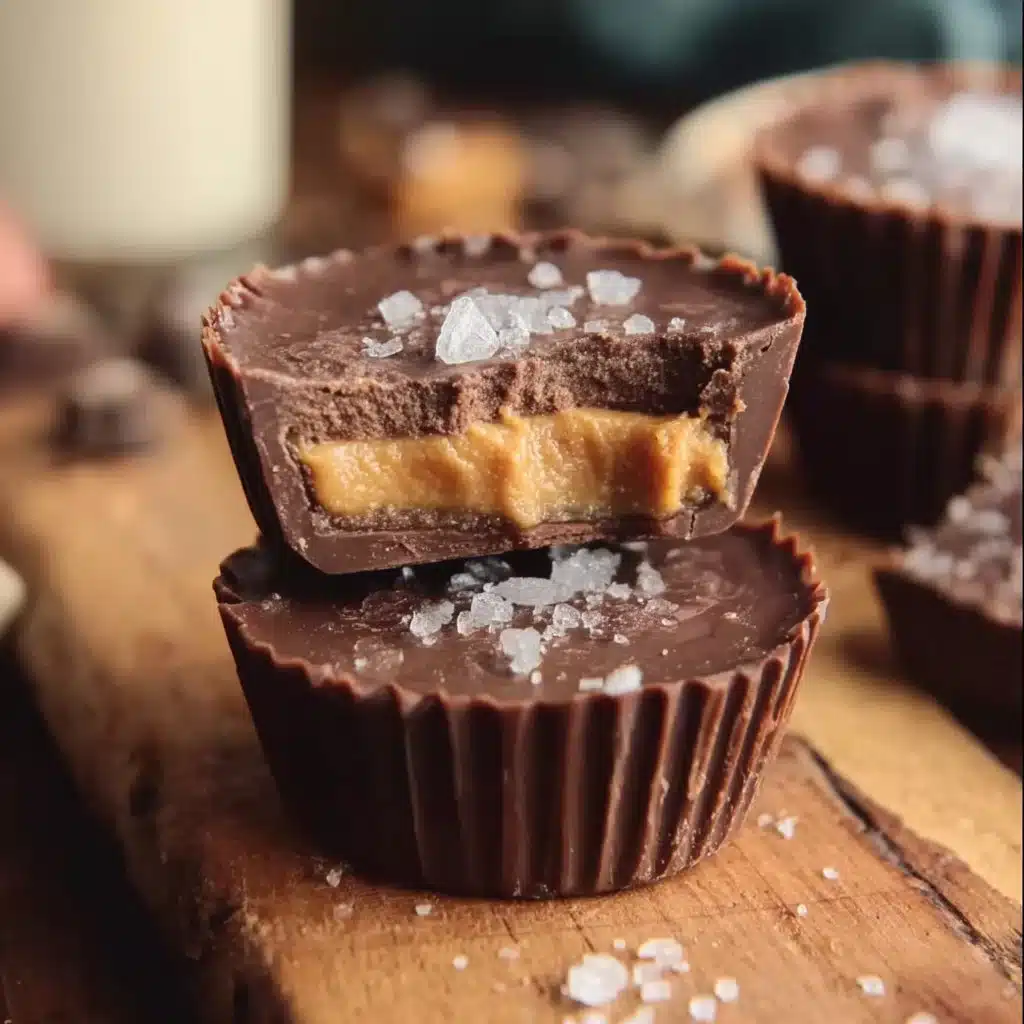
Homemade Peanut Butter Cups arrive as a small luxury: glossy chocolate shells with a satin-smooth peanut filling. This refined version emphasizes texture and balance — a pleasantly firm chocolate snap, a velvety, lightly salted center, and a clean finish. For a playful seasonal take, see our Halloween peanut butter cups for inspiration on presentation and flavors.
Why Make This Recipe
- Effortless Yet Elegant: Minimal steps produce an impressive confection with a polished finish.
- Minimal Ingredients: Pantry staples create a sophisticated flavor profile.
- Impressive Flavor: Balanced sweetness, deep chocolate notes, and a whisper of salt.
This recipe elevates the classic by focusing on chocolate temper and texture—use a ratio of quality chocolate and a silky peanut butter filling to achieve contrast. For plating ideas that suit celebrations, explore our seasonal notes in the linked Halloween version for styling cues and color accents.
Ingredients
Base (chocolate shell)
- 10 oz (280 g) high-quality semisweet or dark chocolate chips or chopped couverture (60–70% cocoa). Note: finely chopped for even melting.
Filling (peanut butter center)
- 1 cup (240 g) creamy peanut butter (natural or smooth). Note: stir until homogeneous if oil separates.
- 1/3–1/2 cup (40–60 g) powdered sugar, sifted to avoid graininess.
- 2 tbsp (28 g) unsalted butter, room temperature, softened.
- 1/4 tsp fine sea salt (adjust to taste).
- 1/2 tsp pure vanilla extract.
Topping
- Extra melted chocolate for sealing (reserve ~2 oz).
- Flaky sea salt or finely chopped toasted nuts for garnish.
Precision notes: use room temperature butter; sift powdered sugar for silkiness; choose a stable creamy peanut butter for best structure.
How to Make Homemade Peanut Butter Cups:
- Prepare molds: Line a standard 12-cup muffin tin with paper liners or use silicone candy molds. Chill the molds briefly to speed setting.
- Tip: Use straight-sided liners for a neat edge.
- Melt the chocolate: Gently melt 2/3 of the chocolate in a heatproof bowl over barely simmering water (double boiler), stirring until glossy. Remove from heat and stir in remaining chocolate to temper and smooth to a thick, shiny sheen.
- Sensory cue: the chocolate should be glossy and pourable, not grainy.
- Form the base: Spoon about 1 teaspoon of melted chocolate into each liner and tilt the cup to coat the bottom and lower sides. Work quickly before the chocolate firms. Chill until just set but still pliable (5–10 minutes).
- Mini-tip: A toothpick helps push chocolate up the sides for an even shell.
- Make the filling: Whisk peanut butter, sifted powdered sugar, softened butter, sea salt, and vanilla until creamy and slightly stiff — it should hold shape when scooped. Adjust powdered sugar for desired firmness.
- Sensory cue: filling should feel satiny and pipeable, not sticky.
- Fill the cups: Pipe or spoon a small dome of peanut filling into each shell, leaving a 1/4-inch gap at the top for sealing. Smooth the surface with a damp fingertip for an even seal.
- Mini-tip: Chill the filled cups briefly if the filling softens the shells.
- Seal with chocolate: Rewarm reserved chocolate to a pouring consistency. Spoon over each filled cup to seal, smoothing the tops. Tap the tin once on the counter to remove air pockets. Sprinkle flaky sea salt or toasted nut fragments while the top is wet.
- Sensory cue: finished tops should be glossy and set to a firm snap.
- Set and serve: Chill until firm, about 20–30 minutes. Allow cups to come to room temperature for a few minutes before unwrapping to reveal a clean edge and pronounced chocolate snap.
- Pro cook tip: Store briefly on a wire rack to avoid condensation when moving to the fridge.
How to Serve Homemade Peanut Butter Cups:
Present on a matte slate or porcelain plate to contrast the glossy chocolate. Arrange cups in small clusters, garnish with a sliver of toasted peanut or micro-herbs for an unexpected note. Pair with a rich espresso or a demi-tasse of dark-roast coffee to accentuate cocoa bitterness. For gifting, nestle in gold-edged boxes with tissue and a ribbon.
How to Store Homemade Peanut Butter Cups:
Keep in an airtight container layered with parchment to prevent sticking. Refrigerate for up to 2 weeks; the cool keeps the shells crisp and the filling stable. For longer storage, freeze in a single layer for up to 3 months — thaw in the refrigerator, then bring to room temperature before serving to restore texture and aroma. Avoid repeated temperature swings to prevent bloom on the chocolate.
Tips to Make Homemade Peanut Butter Cups:
- Use high-quality chocolate (60–70% cacao) for depth and a clean snap.
- Tempering improves sheen and shelf life; if short on time, stir in a little neutral oil for shine but temper for best texture.
- Chill briefly between steps to maintain distinct layers and avoid filling collapse.
- Adjust salt carefully—contrast is key; flaky salt on top provides a refined finish.
Variation (if any):
- Dark Chocolate + Toasted Hazelnut: Fold toasted hazelnut crumbs into the filling for a praline note.
- Salted Caramel Swirl: Add a teaspoon of thick salted caramel into the peanut filling for a glossy ribbon.
- Vegan Option: Use coconut oil with vegan dark chocolate and a plant-based butter substitute; chill to firm.
FAQs
Can I use crunchy peanut butter instead of smooth?
Yes. Crunchy peanut butter adds pleasant texture; pulse briefly to break larger chunks if you want a more uniform bite.
How long will these keep at room temperature?
In cool conditions (below 70°F / 21°C), they can sit out for a few hours. For longer storage, refrigerate to preserve shape and snap.
Can I melt and remelt the chocolate more than once?
Avoid repeated full remelts; gentle reheating in short bursts preserves temper. Overheating can dull flavor and change texture.
Conclusion
This recipe refines a nostalgic confection into a composed, elegant treat—silky peanut butter tempered by a crisp chocolate shell and a whisper of salt. Its simplicity invites creativity: swap nuts, gild with edible gold, or adjust the chocolate percentage to suit your palate. If you enjoy classic inspiration, consider the tried-and-true version from i am baker’s Homemade Peanut Butter Cups for additional technique notes. Share your variations and plating photos in the comments, and spread the recipe with friends who appreciate small luxuries. How would you make this dish your own?
Print
Homemade Peanut Butter Cups
- Total Time: 45 minutes
- Yield: 12 servings 1x
- Diet: Vegetarian
Description
Indulgent homemade peanut butter cups with a glossy chocolate shell and a smooth, salted peanut filling.
Ingredients
- 10 oz (280 g) semisweet or dark chocolate chips (60–70% cocoa)
- 1 cup (240 g) creamy peanut butter
- 1/3–1/2 cup (40–60 g) powdered sugar, sifted
- 2 tbsp (28 g) unsalted butter, room temperature
- 1/4 tsp fine sea salt
- 1/2 tsp pure vanilla extract
- Extra melted chocolate for sealing (reserve ~2 oz)
- Flaky sea salt or toasted nuts for garnish
Instructions
- Line a muffin tin with liners and chill the molds.
- Melt 2/3 of the chocolate in a heatproof bowl over simmering water, then stir in remaining chocolate to temper.
- Spoon melted chocolate into liners and tilt to coat, then chill until just set.
- Whisk together peanut butter, powdered sugar, butter, sea salt, and vanilla until creamy.
- Fill each chocolate shell with peanut butter mixture, leaving room at the top.
- Spoon reserved chocolate over each cup to seal and sprinkle with flaky salt or nuts.
- Chill until firm (20–30 minutes) before unwrapping and serving.
Notes
For best texture, use high-quality chocolate and sift powdered sugar. Store in an airtight container for up to 2 weeks.
- Prep Time: 15 minutes
- Cook Time: 30 minutes
- Category: Dessert
- Method: Chilling
- Cuisine: American
Nutrition
- Serving Size: 1 cup
- Calories: 250
- Sugar: 16g
- Sodium: 100mg
- Fat: 18g
- Saturated Fat: 6g
- Unsaturated Fat: 10g
- Trans Fat: 0g
- Carbohydrates: 18g
- Fiber: 1g
- Protein: 7g
- Cholesterol: 15mg